
Recipe Mutiny steals recipes from food blogs and recipe sites. Then we publish them. With credit (Naturally).
Thursday, August 29, 2019
3 Homemade Summer Sauces to Put on Everything You Grill

These three easy sauce recipes go with everything, and are perfect for your Labor Day party—and other late-summer grilling sessions.
Secret’s in the sauce, and we’re not talking about the felony-warranting “Fried Green Tomatoes” kind. Grills have been fired up for a couple months now and summer is winding down, but definitely not over. Therefore, if you haven’t already, it’s time to perfect your sauce making and basting skills so that you can impress all of your BBQ and picnic guests (Labor Day is your time to shine).
Anyone who’s anyone knows that there are three versatile sauces that work with nearly every protein: barbecue, chimichurri, and romesco. You’re probably more familiar with the first one (#iwantmybabybackbabybackribs), though chimichurri and romesco offer herbaceous and peppery (respectively) departures from what your taste buds interpret as “tried and true.” And trying something new is always a good thing.
We’ve broken down the tasty trio below, including recipes and dishes where these sauces shine. Check them out!
BBQ Sauce

Chowhound
What is barbecue sauce?
The ingredients differ by region and part of the globe, but (excepting white BBQ sauce) most include some variation of tomato paste, vinegar, mayonnaise, mustard, spices, and a sweet component like sugar or molasses. The sauce is extremely versatile, as it can be used as a dip, marinade, baste, or condiment. Get our Basic Barbecue Sauce recipe.
Related Reading: A Guide to Regional BBQ Sauces of America | Chowhound Recommends Our Favorite BBQ Sauces | The Best Store-Bought Keto & Paleo Barbecue Sauce to Buy
Dish Suggestion: Easy BBQ Baby Back Pork Ribs
Chowhound
Honestly, why should you ever mess up a good thing when you have it? These fall-off-the-bone ribs will put those annoyingly catchy Chili’s commercials to shame. But this BBQ sauce will also shine on chicken, pork shoulder, and even burgers. Get our Easy BBQ Baby Back Pork Ribs recipe.

Chowhound
Want to level up your barbecue sauce game with the addition of bourbon? Get our Bourbon-Bacon Barbecue Sauce recipe (also good on basically everything).
Chimichurri Sauce

Chowhound
What is chimichurri sauce?
Used primarily in South American (Argentinian, predominantly) and Mexican dishes, this parsley-heavy sauce is blended with garlic, vinegar, olive oil, and red pepper flakes for a perfect component to grilled red meat, chicken, shrimp, or fish. It just so happens to be naturally keto-friendly too. Get our Argentine Chimichurri recipe. And if you’re down with all the fresh herbs but want something a little creamier and spicier too, try Peruvian aji verde sauce; it works with all the same things as chimichurri.
Related Reading: How to Have a Keto BBQ
Dish Suggestion: Argentine Grilled Tri-Tip

Chowhound
Chimichurri shines as a cool topping on a hot piece of steak. An Argentinian tri-tip is a perfect option because it’s not only geographically thematic, but also capable of handling an excess amount of sauce. Get our Argentine Grilled Tri-Tip recipe.
Romesco Sauce

Chowhound
What is romesco sauce?
Originating in northeastern Spain, this nut and red pepper-based sauce pairs perfectly with seafood but also works with pork and chicken. Common ingredients also include garlic, sunflower oil, vinegar, and other nuts and peppers, though you can essentially tailor it to meet your needs. Get our Romesco Sauce recipe.
Dish Suggestion: Roasted Shrimp with Romesco Sauce

Shrimp love a tomato bath, especially if it’s chock-full of spices, garlic, pine nuts, and other Spanish-derived flavors. Give them a dunk in this zesty romesco, which can also be used as a dip for fresh bread. Get our Roasted Shrimp with Romesco Sauce recipe.
Read More: Curtis Stone’s Easy Steak Sauce Is Fantastic | 9 Delicious Vegan Sauces to Put on Everything
Related Video: Smoked Barbecue Baby Back Ribs
from Food News – Chowhound https://ift.tt/2KELkpL
via IFTTT
Our S’mores Bars Are Basically Summer Christmas Crack

S’mores bars are a perfect potluck dessert, especially during summer—and an ideal choice for any Labor Day celebration. While it’s not quite no-bake, our best s’mores bar recipe is absolutely worth turning on the oven for (for under 10 minutes). It takes just eight ingredients and about 30 minutes from start to finish. Plus, it serves a big crowd and can be made ahead, which is always a bonus.
Why S’mores Bars?

Chowhound’s Best S’mores Recipe Ideas
Actual, good old-fashioned s’mores are not exactly complicated—roast a marshmallow, combine it with chocolate and graham crackers, et voila—and yet it’s surprising how often they just…don’t happen. When you’re camping, sure, but at cookouts and BBQs, the grill is often cold by the time you’re in the mood for dessert.
And while s’mores will easily feed a crowd (provided you have enough roasting sticks), they can make a huge mess. So consider our s’mores bar recipe a make-ahead, portable, crowd-pleasing alternative:

Chowhound’s S’mores Bars
It involves all the usual suspects: graham crackers, marshmallows, and chocolate (although we swap in bittersweet for the usual, sometimes-cloying milk chocolate), plus the addition of caramel and pecans for extra texture and nutty flavor. We’re fans of hacking traditional s’mores with different ingredients, too, but leave out the nuts here if you like.
Confession: It’s Really Just Christmas Crack In a Summer Outfit
Truthfully, this is pretty much just a summerized version of our favorite easy holiday desserts: Christmas crack and its cousin, matzo crack. The crisp base of graham crackers stands in for Saltines or unleavened bread, but the shiny caramel coating, rich chocolate top layer, and sprinkling of toasted nuts are all the same. There is, of course, the addition of mini marshmallows for both toasted crunch and interior chew (and because you can’t have s’mores without ’em).

Chowhound’s Matzo Brittle (for comparison)
Our S’mores Bar Recipe
This recipe makes 40 pieces, so we’re not kidding about the crowd-pleasing part. You make the s’mores bars on a rimmed baking sheet lined with foil, so clean-up is easy.

Nordic Ware Natural Aluminum Half Sheet Pans, 2 for $19.99 on Amazon
If you're in the market for new baking sheets, these are best-sellers.
As for the caramel, you don’t even need a candy thermometer (seriously, making caramel is not scary if you just keep a couple simple tips in mind). Store the cooled and cut bars between layers of wax paper in an airtight container and they’ll last for up to 4 days, so you can get a jump on your party prep too.
And if you happen to bring them out while the coals are still hot, well, they are great warmed up a little bit on the grill.
S'more Bars
Ingredients
- 16 (4-3/4-by-2-1/2-inch) whole graham crackers
- 8 tablespoons unsalted butter (1 stick), cut into 6 pieces
- 1/2 cup packed light brown sugar
- 1/4 plus 1/8 teaspoons fine salt
- 1/4 teaspoon vanilla extract
- 4 cups mini marshmallows
- 1 1/4 cups bittersweet chocolate chips
- 1 1/3 cups toasted pecans, coarsely chopped (optional)
Instructions
- Heat the oven to 350°F and arrange a rack in the middle. Line a rimmed baking sheet with 2 overlapping pieces of aluminum foil so the entire sheet and all 4 edges are covered. Arrange the graham crackers tightly together in a single layer on the baking sheet, using broken-up pieces to fill any empty spaces; set aside.
- Place butter, brown sugar, and salt in a small, heavy-bottomed saucepan over medium heat and bring to a full boil, stirring occasionally with a rubber spatula to dissolve the sugar, about 5 to 6 minutes. Remove from heat, slowly add vanilla (the mixture may bubble up), and stir to combine.
- Pour mixture over graham crackers and spread evenly using the rubber spatula. Evenly sprinkle marshmallows in a single layer over top. Bake until marshmallows are puffed and just starting to brown, about 8 minutes.
- Remove the baking sheet from the oven and place it on a wire rack. Evenly sprinkle chocolate chips over the marshmallows and let sit until the chips are softened, about 5 minutes. Lightly drag a toothpick or skewer over the surface and through the softened chocolate chips to create a marbled pattern. Evenly sprinkle with nuts, if using. Let cool until warm, about 20 minutes, then refrigerate or freeze until the chocolate has set, about 15 to 30 minutes.
- Remove the s’more slab from the baking sheet using the foil to lift it in one piece. Transfer to a cutting board. Remove and discard the foil. Using a sharp knife, cut the slab into 2-inch squares. Store between layers of waxed paper in a container with a tightfitting lid; the bars will keep in the refrigerator for up to 4 days.
Other S’mores Dessert Recipes
If you’re looking for s’more ways to make s’mores desserts, here are a few others we love:
from Food News – Chowhound https://ift.tt/2TjjqBc
via IFTTT
How to Safely Make an Omelette in a Bag

If you’re hitting the trails or campsite this Labor Day Weekend you’ll need your morning protein, and this genius omelette in a bag is the easiest, most perfect way to start any day spent in the great outdoors.
My uncle introduced me to the “omelette in a bag” when I was an impressionable college freshman living in a dorm. A firefighter, he said his firehouse used the recipe when they needed a quick breakfast in between emergency calls. I think he may have overestimated the rigor of my liberal arts program.
Nevertheless, “omelette in a bag” is a fantastically obvious, easy, and fun recipe—especially for campers. It requires almost no clean up and few ingredients. All you need is eggs, your favorite omelette ingredients, a bag, and a pot of boiling water. There’s no skillet to scrub down, or pan to balance on sticks above a campfire.
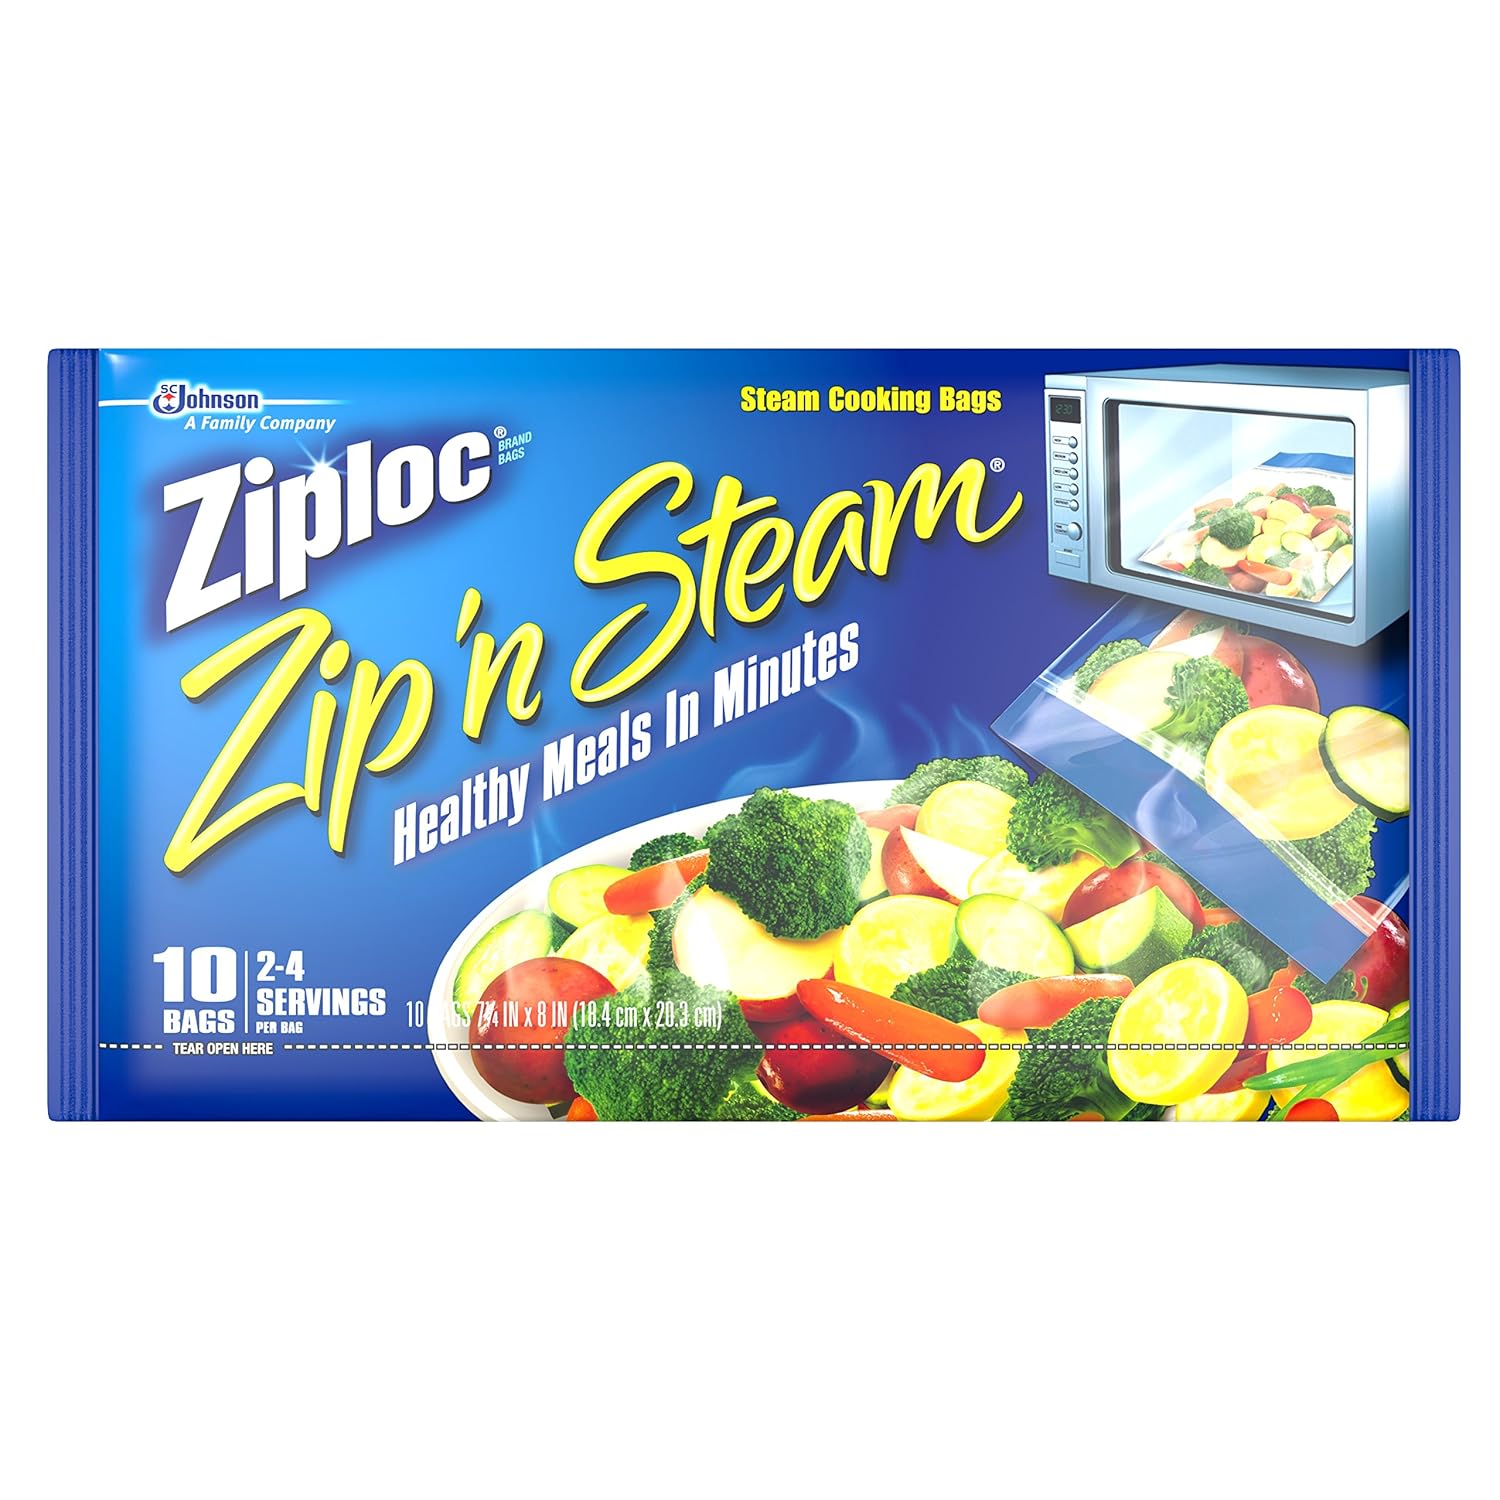
To make “omelette in a bag” you must abandon any sensitivities about cooking with plastic. There’s no denying the chemistry at play here; your egg will enter the party wearing the likes of a latex tube dress and will go home with you. To ensure nothing harmful slips into your yolk, you’ll want to choose the right bag: a strong, classic quart-sized Ziploc with a zipper.
Most Ziploc bags are made with low-density polyethylene, a term you’ll likely confuse with others soon enough and that’s fine. Low-density polyethylene, alongside high-density polyethylene and polypropylene, is considered a relatively safer choice plastic in this scenario: It does not release Bisphenol A (BPA), a chemical that can have negative health effects. (You didn’t ask, but you might want to know plastic straws are usually made of polypropylene.)

Shutterstock
Polycarbonate, on the other hand, is more of a bad guy in this situation. It can release BPA, so you’ll want to avoid making “omelette in a plastic bottle” or “omelette in a take out container”. That’s not to say polycarbonate is too terrible—it’s just not great when heated up. The National Institute of Environmental Health Sciences says polycarbonate plastics tend to break down from exposed heat and/or dishwashing, which could allow BPA to sneak into your foods.
Still skeptical? You have the right to be! However, about 10 years ago, Good Housekeeping conducted an in-depth study on chemicals released from common kitchen plastics and found that most were passable on BPA scans. Furthermore, Ziploc has since released its Zip ‘n Steam™ Microwave Steam Cooking Bags, which the company says safely allows for steaming in the microwave—and, in turn, for “omelette in a bag.” You have options.
But enough about the plastic. You’ve read this far; you’re on board. So here goes…
How to make an omelette in a bag:
1. Bring a pot of water to a soft boil.
2. Crack a few eggs into a plastic Ziploc bag.
3. Add salt, pepper, and any other ingredients you like. Think mushrooms, chopped broccoli, etc. Some say “omelette in a bag” was first invented in the West, in Denver. So if you want to eat an authentic Denver omelette, be sure to add ham and red and green bell peppers.
4. Squeeze any remaining air out of the plastic bag. This is critical! If you can’t get it all out, leave the bag unzipped, slowly dip it into the boiling water up to the seal, and then seal it shut. The heat of the water should force the extra air out of the small opening.
5. Boil for 15 minutes.
6. Pull the omelette out with tongs, or simply shake it out of the bag. You’ll probably be surprised by how smoothly the omelette rolls out. If you cook thoroughly enough, the omelette should keep its shape, and no one will know the difference from your “omelette in a bag” and one prepared at your favorite brunch spot.
Rollie Hands-Free Automatic Electric Vertical Nonstick Easy Quick Egg Cooker, $29.95 on Amazon
It's also way cheaper than this single-use gadget option!
Related Video: How to Make the Basically Perfect Omelette
All featured products are curated independently by our editors. When you buy something through our retail links, we may receive a commission. For more great hand-picked products, check out the Chowhound Shop.
from Food News – Chowhound https://ift.tt/2Hz37vm
via IFTTT
The Kitchen and Cookware Sales Happening This Labor Day Weekend

Labor Day Weekend means a lot of things to a lot of people, but to the bargain-minded among us, it’s a total jackpot of discounts, deals, and steals. That, of course, applies to the all-important online retail space and some of our favorite kitchen and cookware retailers are dropping the price down low on small and big-ticket items like KitchenAid, Whirlpool, and more.
Many of these sales start early and extend past the weekend offering free shipping and special discount codes. These are the best sales on kitchen appliances, kitchen tools, cookware, and more happening for Labor Day Weekend.
Related Reading: The Best Meat Delivery Deals for Labor Day Weekend
Macy’s
The O.G. department store is offering sitewide sales on select kitchen and home goods plus 10 percent off small appliances with code WKND, and on Sunday and Monday morning only take an extra $10 off any purchase of $25 or more on select items with the code WKND25.
Sur La Table
Sur La Table’s Savor Summer Sale means up to 55 percent off of cookware, and up to 30 percent off most KitchenAid products like this stand mixer for less than $300! Plus take an extra 20 percent off clearance items.
Target
Look for 25 percent off home items including kitchen tools and cutlery. Want something bigger? Whirlpool appliances are 30 percent off all weekend, too.
Related Reading: Kick Off Fall with These September ‘ALDI Finds
Walmart
As you might expect the megastore is having mega rollbacks on everything from kitchen & dining to furniture and much more all weekend. One of our favorite Nutri-bullet personal blenders is down under $90.
Wayfair
The online retailer already famous for low prices is slashing some kitchen tools, kitchenware, and appliances up to 75 percent with free shipping on orders over $49.
Etsy
Etsy, the home of unique, craft, and handmade goods, is getting in on the Labor Day Weekend fun with select items on sale across the site like this perfect wedding gift for a baker/wine lover.
Lowe’s
The hardware superstore is kicking off with a store and site-wide sale (through September 4th) on grills, kitchen appliances, and more.
from Food News – Chowhound https://ift.tt/30ThvGJ
via IFTTT
How to Roast Marshmallows to Perfection Every Time

Knowing how to pull off perfect roast marshmallows is a worthy life skill, and not as simple as it may sound. August 30 is National Toasted Marshmallow Day (and Labor Day—one of many prime s’mores making occasions during summer—is just around the corner), so it’s the perfect time to learn how to achieve roasted marshmallow perfection.
There’s a lot to love about camping, but dessert might be near the top of the list, because sweet campfire treats means s’mores. The chocolate and graham crackers in the classic ooey gooey trio are both essential, but the sublimity of the miniature sandwich really hinges on the perfectly roasted marshmallow, which is both an art and a science. So how do you get that evenly golden-brown, crisp shell and warm, molten center?
One of the key factors is patience—this is not an endeavor where shortcuts yield an acceptable result. Thrust your marshmallow directly into the flames and it will catch fire and carbonize. Hold it just above the flames and the same thing will probably happen, though it may take longer, and you may be lulled into a false sense of assurance before the gentle bubbling and browning flashes over into bitter black immolation.
Allegedly, some people enjoy this style of charred marshmallow—cold, uncooked middle and all—but for the rest of us, a more measured approach is in order. Steps 3 and 4 are the most important, but it’s worth paying attention to all parts of the highly scientific process for the perfect bite.
1. Choose Your Stick
This can be a metal skewer, multi-pronged or otherwise, with a wooden handle, or better, an actual stick you’ve sharpened and shaved the outer layers from (at least at the top portion where you’ll be impaling your marshmallow). Skewers may seem more sanitary, but they’re also more annoying to clean. Sticks are in keeping with the rustic spirit of camping, and can simply be tossed into the flames at the end of the trip. Plus, it’s more fun to hunt for the perfect one. If you want to put some more thought into it than simply searching for the stick that looks right, this guide covers different types of wood for roasting, but it’s usually an instinctual thing with the feel of ritual to it. The stick should, of course, be long enough to keep your hand comfortably away from the fire, and should not be flimsy or floppy. If it starts splintering into shards when you whittle the tip into a tiny spear, toss it and find a more suitable specimen.

Chowhound’s Campfire Fondue S’mores
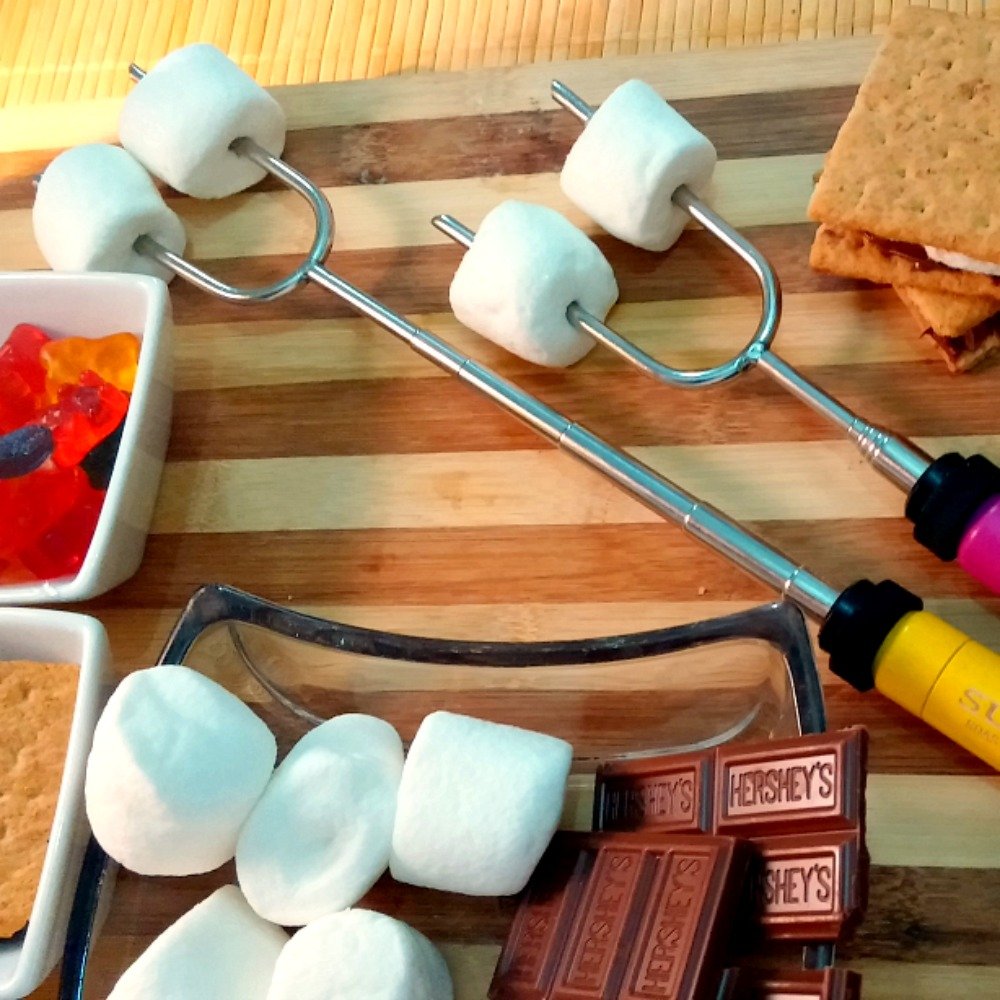
SUMPRI Marshmallow Roasting Sticks, 6 for $18.95 on Amazon
Whittling sticks is part of the magic, but you can also try these 34-inch extendable steel forks if you must.
2. Impale Your Marshmallow
Yes, it pays to take care here too. Stab it through the center since the marshmallow will sag and slide as its innards melt, and go all the way through the length of it so it doesn’t slip right off the tip of your stick as the airy, sugary puff heats up—but don’t thread it too far down or you’ll lose more of the melty goodness at its heart when you slide it back off to eat.

Stuffed Puffs Chocolate Filled Marshmallows, $3.98 at Walmart
We recommend only a single toasting for these chocolate-stuffed marshmallows.
3. Find the Sweet Spot
Your fire should have burned down quite a bit by the time you’re ready to roast your marshmallows, and you want to find a natural concavity in the pile of logs where there are glowing embers but no active leaping flames. Hold your marshmallow about 5 to 8 inches above this spot—if you can rest the stick on the edge of the fire ring or on a rock to keep it steady and an even distance from the coals, all the better.

Chowhound
4. Rotate Frequently
Frequent rotation paired with the more consistent heat of glowing coals (as opposed to flames) is what gets you that delicately crisp and caramelized outer layer, like a thin crust of earth over the liquid magma center. Be vigilant and give your stick a quarter turn every 20 seconds or so—or more or less frequently, depending on how fast you see toasting happening. Keep turning your little spit until the outside of the marshmallow is evenly browned and crisp and the whole thing sags somewhat away from the stick.
5. Cool It
It’s hard not to chomp into your perfectly roasted marshmallow right away, but remember how it’s like magma? Yeah. Blow on it a bit to cool it down somewhat before biting in, lest you scorch your entire mouth and toast your taste buds in the process.

Chowhound’s Homemade Chocolate Graham Cracker S’mores
6. Enjoy!
A roasted and slightly cooled marshmallow is divine eaten on its own, nibbled straight off the stick (although if you use a metal skewer, be careful, since those stay searing hot and will be like a fire poker straight to the lips), but its greatest application is probably squished between chocolate and graham crackers. To dress it up a bit, try making bacon s’mores, or use chocolate graham crackers and peanut butter. True connoisseurs who prefer their marshmallows unadulterated can slip the toasty skin off to savor, and then roast the gooey inner core again—or stick it straight into the fire against all advice, because it is really hard to wait.
Related Reading: The Ultimate Mix-and-Match S’mores Bar
No Campfire?
No problem. You can fashion miniature marshmallow roasters from terracotta pots, or turn your sticks patiently above the flames of a propane stove if you must, even over a regular kitchen stove burner if you’re stuck at home—or broil them in your oven if that’s your best option. (You can even toast marshmallows in your air fryer if you have one.) There is, of course, no better marshmallow than the one roasted over a glowing campfire under the stars, but any toasty, gooey marshmallow is better than none.
If you’re in LA and feel a sudden inspiration to pick up your stick, see How to Find Last Minute Camping in Los Angeles.
Related Video: How to Make Marshmallows
from Food News – Chowhound https://ift.tt/2Pma8G8
via IFTTT
The Best Gifts for Fans of ‘The Great British Baking Show’

Does the return of “The Great British Baking Show” feel like Christmas? We can relate. That’s why we’re revisiting our 2018 holiday gift guide for the occasion of the U.S. season 10 premiere on Friday, August 30 (and hey, if pumpkin spice products are already back, then it’s not too early to start holiday shopping).
By turns touching, tense, dramatic, drool-worthy—cringe-worthy too—often hilarious, inspiring, and always delightful, “The Great British Baking Show” (aka, GBBS, GBBO, or “The Great British Bake Off”) has won fans far and wide. If you happen to know one, finding a perfect present doesn’t have to be a technical challenge—we’ve rounded up gifts that have both style and substance, and some are definite showstoppers.
Whether your recipient still pines for Mary, Mel, and Sue, or finds the new batch just as charming, when they unwrap one of these presents, from show-specific merchandise to essential baking tools, they’ll deem you star gift-giver for sure. Ready, set, shop!
Note: Prices do not include shipping and handling, where applicable.
“The Great British Bake Off” Coloring Book, $13.99 on Amazon

Amazon
Even when the bakes don’t turn out as planned (collapsing cakes, melting mousse, grabbing salt instead of sugar…forgetting to turn on the oven), the intricate illustrations of each contestant’s creation are always perfect. Many of them, along with drawings of the tent and grounds, are collected in this coloring book for those who’d like to take a crack at shading them in by hand. (Incidentally, if you’ve ever wondered why we call the show by a different name in the U.S., it’s because “Bake Off” is kind of Pillsbury’s thing.)Buy Now
“The Great British Bake Off” prints, $19.11 and up on Tom Hovey’s The Baked Print Shop

Tom Hovey/The Baked Print Shop
If you (or your recipient) would rather just hang one of the lovely illustrations on your wall (albeit sans color), the show’s artist, Tom Hovey, sells prints in his online shop. From contestant Paul’s famous lion bread to Nadiya’s fizzy pop cheesecakes, the classics are well represented. Find prints from the most recent season too, like Kim-Joy’s lemon lavender forest cake adorned with little foxes.Buy Now
Mason Cash Cane Mixing Bowl, $39 – $100 at Sur La Table

Sur La Table
Made in England by Mason Cash since 1901, these iconic bowls that are used in the show are great for mixing all sorts of doughs, batters, frostings, and fillings, and they look fetching, of course—but the raised design also makes getting a grip easier, even when your hands are full of butter. Available in six sizes, the sturdy earthenware bowls are microwave, oven, freezer, and dishwasher-safe as well.Buy Now
Star Baker Wooden Spoon, $16 on Etsy

The Sassy Chikkin/Etsy
This beechwood spoon sports a hand-woodburned “Star Baker” motto with a design inspired by the show logo, but if you’d like a version engraved with your giftee’s name, this one fits the bill—while still alluding to the coveted title every baker hopes to earn each week, or at least once in a lifetime.Buy Now
Star Baker Apron, $20.32 on Etsy

LingArt Designs/Etsy
For those who’d rather wear their love on their sleeve (or chest, anyway), this “Star Baker” apron has a roomy pocket for stashing tools and tidbits (and maybe a recipe that’s hopefully more detailed than “Make the custard.”). Its long length protects clothing from flying flour and lashings of ganache, and it’s available in pink, teal, and a steely gray (much like Paul’s hair), in addition to the festive green shade shown here.Buy Now
Quilted Heat-Resistant Double Oven Mitt, $12.98 on Amazon

Cuisinart/Amazon
The handy double mitts many contestants use when taking their bakes out of the oven make great stocking stuffers or housewarming gifts, or can be combined with a few other baking tools for a multi-part present.Buy Now
“Nobody Likes a Soggy Bottom” Mug, $12.95+ on Etsy

Nerdy Design Shop / Etsy
Soggy bottoms are a big no-no, but this cheeky catchphrase is sure to bring a smile to many fans, whether emblazoned on a mug or printed in t-shirt form (with Mary Berry’s likeness to boot).Buy Now
“The Great British Baking Show” Seasons 1-5 DVD Set, $79.95 on Amazon

PBS/Amazon
For those who haven’t quite gotten used to Prue, Sandy, and Noel (or who adore them, but still have a soft spot for the original crew too), the DVD set of the first five seasons (as aired on PBS) makes it easy to re-watch favorite episodes, or just put them on for comforting background ambience, anytime. Sure, you can stream episodes—”The Great British Baking Show” Christmas special on Netflix is a must-watch!—but some people (my mom, for one) still fancy the old-fashioned option too.Buy Now
“The Great British Bake Off Big Book of Baking” by Linda Collister, $21.94 on Amazon

BBC Books/Amazon
Anyone who’s not only been inspired to bake by GBBO but tempted to recreate some of the specific show recipes will love this cookbook, although be aware that the measurements are metric. That’s easy enough to deal with if you have a kitchen scale (if your giftee doesn’t, be extra-generous and include one along with the book).Buy Now
“Mary Berry’s Baking Bible: Over 250 Classic Recipes” by Mary Berry, $23.32 on Amazon

BBC Books/Amazon
Follow Mary Berry‘s recipes for muffins, scones, cakes, and breads and you’ll end up with something absolutely scrummy. You’ll appreciate the full-color photos and illustrations for more detailed steps, too, but again, the measurements here are metric. (The more recent “Baking with Mary Berry: Cakes, Cookies, Pies, and Pastries from the British Queen of Baking” does have recipes that have been converted to U.S. measurements, but some reviewers feel it’s lacking in personality compared to Mary’s Bible.)Buy Now
“Paul Hollywood’s Bread” by Paul Hollywood, $21.99 on Amazon

Bloomsbury Publishing/Amazon
A perennial fixture of the show and a master bread baker himself, Paul Hollywood has several books of his own (like the simply titled “How to Bake”), but this is a great starting place, because it teaches you how to make dozens of types of bread, and then how to turn them into meals (not that you can’t make a meal out of bread alone, perhaps with a bit of butter). Step-by-step photos and allegedly foolproof instructions make it easy to achieve homemade bread worthy of the Hollywood handshake. We’re betting there’s no recipe for pita bread cooked on a campfire, though.Buy Now
“Nadiya’s Kitchen: Over 100 Simple, Delicious Family Recipes” by Nadiya Hussain, $27.69 on Amazon

Penguin UK/Amazon
Following in the judges’ footsteps, several past GBBO contestants have also published cookbooks, including the memorably expressive and totally endearing Nadiya Hussain. With one of her tomes—which include recipes for all sorts of meals, not just dessert—you can and you will make a lot of delicious food! You might want that digital scale, though, because this book also uses metric measurements.Buy Now
Digital Kitchen Scale, $8.99 on Amazon

Greater Goods/Amazon
Seriously, digital scales are so affordable and so accurate, they’re a great purchase even if you’re not making metric recipes. Measuring by weight gives you the most precise results, which goes a long way toward a perfect bake (although, of course, there are other factors involved, accidental sabotage among them…just ask anyone who remembers BinGate).Buy Now
100th Year Edition KitchenAid Stand Mixer, $399.95 at Sur La Table

Sur La Table
Any serious baker without a KitchenAid mixer likely covets one, and while this exact model was never used on the show, it looks quaint enough to be right at home in the tent. (For a bit more dough, it comes with a darling hobnail ceramic bowl at Williams-Sonoma, in the same pale blue shade.) Any model will mix batters and whip cream and egg whites to perfection, though, making everything from Bakewell tarts to baked Alaska that much more achievable.Buy Now
Joseph Joseph Adjustable Rolling Pin with Removable Rings, $13.64 on Amazon

Joseph Joseph/Amazon
Even seasoned bakers can struggle with rolling out pie crusts and cookie doughs to an even thickness, but this beechwood rolling pin is a real confidence booster, as the adjustable plastic rings control the height of the pin relative to the rolling surface—an easy shortcut to perfection (at least during the beginning stages of the baking).Buy Now
Extra Large Non-Slip Silicone Pastry Mat with Rolling Guides, $19.95 on Amazon

Folksy Super Kitchen/Amazon
Another super-useful tool for bakers? A silicone mat on which to roll out dough, that’s also oven-safe and nonstick so it can be used to line sheet pans too. This one has a helpful size guide for getting pie and tart crusts to the correct diameter (always add a couple inches to allow for crimping!), and the mat itself is 20 by 28 inches, so you can even roll out enough fondant to cover a cake.Buy Now
OXO Good Grips Stainless Steel Bench Scraper, $9.99 on Amazon

OXO/Amazon
Bench scrapers may seem so basic they’re boring, but they’re great for blending butter, scraping up sticky dough, and cutting it into portions–so no wonder it’s one of Paul Hollywood’s must-have baking items. Consider wrapping it up along with one of his cookbooks…Buy Now
Rubbermaid Stainless Steel Oven Thermometer, $6.30 on Amazon

Rubbermaid/Amazon
An accurate oven temperature is crucial to exceptional baking (which is why “The Great British Baking Show” crew bakes a finicky Victoria sponge in every oven each day before taping begins). Oven thermometers are cheap and fantastic for discovering your oven’s true temperature—and they’re also the perfect size for a stocking stuffer.Buy Now
Betty Crocker 3-Tier Cooling Rack, $14.21 on Amazon

Betty Crocker/Amazon
A three-tier cooling rack frees up valuable counter space and means you can make multiple traybakes, pies (hand-raised or otherwise), cakes, and/or batches of cookies at once.Buy Now
Kootek Frosting Tools Set with Piping Tips and Bags, 42 pieces for $9.94 on Amazon

Kootek/Amazon
A professional-grade decorating set (this one includes two reusable silicone pastry bags, 36 different icing tips, and two flower nails for building beautiful roses) is great for creating showstopping cakes, of course—but also useful for piping meringue, forming and filling macarons, and squeezing out choux pastry for protfiteroles, éclairs, and so much more.Buy Now
Handmade Porcelain Cake Stand, $31.96 at Sur La Table

Sur la Table
Once all the finishing touches have been put on a bake, it needs a pedestal to be placed upon, and this classic white porcelain cake stand is simple, elegant, and lets the dessert take center stage—even if the only ones judging it are friends and family. A cake plate with a frilly scalloped edge is also pretty, but still won’t steal the show.Buy Now
Passion Fruit Petit Fours, 60 for $64 at Sur la Table

Sur la Table
Then again, if you know your “Great British Baking Show” fan isn’t destined to be star baker no matter what tools are at their disposal—or if they only enjoy being in the kitchen vicariously—you can always give them the gift of a delicious confection, like these high-end petit fours, tidy enough to impress even Mary Berry. The flavors are mostly fruity (pineapple, berry, orange, strawberry, and tangerine), plus mocha (that’s pronounced “mocka” of course).Buy Now
Asymmetric Necklace, $47.60 on Etsy

ORIKO/Etsy
No, it’s not kitchen-related, but if your recipient has been won over by new judge Prue Leith (whether because of or despite her habit of talking with her mouth full), her bold style may well have something to do with it—in which case, consider gifting them a bright and chunky asymmetric statement necklace like the ones Prue wears.Buy Now
from Food News – Chowhound https://ift.tt/2ZuUyMp
via IFTTT
These Are the Foods You Should Have On Hand During a Hurricane

Contemplating natural disasters like hurricanes and wildfires may suppress your appetite, but we must eat to live, and gathering food supplies is an important part of being prepared to survive catastrophic events, as we’re reminded with Hurricane Dorian threatening Florida.
We have the benefit of early warning systems for many natural disasters, and most of us have the option to stock up well beforehand too—yet many of us don’t, despite knowing how mobbed grocery stores will get when trouble is on the way. You don’t have to take it to doomsday prepper levels, but it’s a good idea to have some essentials on hand just in case the worst does come to pass. Even if you’re short on space, you can find a corner of your closet or room under your bed for a small box or bag of emergency supplies and rations.
Here are a few basic tips:
1. You should have a first aid kit, of course, and material supplies like flashlights, extra batteries, a utility knife, hand sanitizer, and so on. Here’s a full list of things to pack in advance.
2. It doesn’t hurt to have a portable charger for your phone, and there are even mobile apps that are helpful to install on it ahead of time.
3. As for your food stores, you want to focus on nutritious, high-protein items that don’t require cooking or refrigeration, and while canned items fit that bill, it’s good to have lighter options you can carry too in case you need to leave your home.
Here’s a list of suggested staples to keep on hand, whether you’re expecting a natural disaster or not. Better to be as safe and as ready as you can be.
Bottled Water + Water Filtration Device
You can last a long time without food if you absolutely have to, but water is essential. While it’s smart to keep a big supply on hand in the form of bottled water, if you end up needing to leave most of your things behind, make sure you have a water filtration device with you when you go. Be sure to check the directions well ahead of time to make sure it’s ready to use when you need it, too. Remember that you might need water for sanitation as well, and for your pets if you have them.

LifeStraw Personal Water Filter, $17.47 on Amazon
This portable personal filter is good to keep on hand for emergencies (or take on camping and hiking trips).
Coffee and/or Tea
If you’re used to your daily cuppa, it’s a good idea to stock instant versions of coffee and/or tea; caffeine withdrawal won’t help you in a tough situation, and being able to enjoy a little bit of routine amid upheaval helps you feel better too. If you won’t have a way of heating your water (maybe get some solid fuel cubes in advance), you may be even more disgruntled by the prospect of cold brew, but in that case, you could always try caffeinated gum instead.
Canned Tuna, Salmon, Sardines, Chicken, Ham
Canned meat or fish lasts a long time, and can be eaten by itself for a quick hit of protein, or mixed with some of your other staples. You might want to buy lower sodium versions since they’re healthier and also won’t make you quite as thirsty—and pop tops when you can, in case you lose track of your can opener.
Seasonings
In the same vein of thinking ahead, since you probably have a stash of single-serve condiment packets (say, ketchup and hot sauce in your glove box from your fast food drive-through visits, or soy sauce and mustard from Chinese delivery), add those to your stores too, so you can inject some extra flavor even in dire circumstances. They’re little and light, so you can carry them without taking up much space—and they can make a pouch of plain tuna a much tastier prospect.
Peanut Butter
A classic protein powerhouse, peanut butter can last a long time on the shelf, even once it’s opened (three months under optimal conditions). Ditto other nut and seed butters.
Crackers or Crispbread
While a loaf of bread is good to have around as a vehicle for other foods, crackers or crispbread will last a lot longer and be more portable.
MREs
They may be a last resort, but MREs and freeze dried meals intended for backpackers are perfect to store away in case of emergency. Some companies provide literal buckets full of just-add-water meal options, which helps take the stress out of figuring what to buy, at least.
Cereal and Granola
Dried cereal and granola are good lightweight snacks you can tote along with you, but choose whole grain and low sugar options to maximize the nutritional value, which is also important to consider.
Dried Fruit
The shelf life for some fresh fruit, like apples and oranges, is quite long, but a lot of other produce is rather delicate and not great for storing, so dried fruit is a good choice in an emergency. Raisins, pineapples, figs, mangoes—you can buy pretty much any fruit in dried form (and do it especially economically from bulk food sections), and they’re great to have on hand for on-the-go energy.
Dehydrated Vegetables
Canned vegetables are a great choice for your pantry and will be much appreciated in an emergency, but if you need to take food with you, dehydrated produce is a lot lighter and easier to pack.
Powdered or Shelf-Stable Milk
Both conventional and non-dairy milk can be found canned or boxed, hence not requiring refrigeration. The powdered variety will be more portable, but requires water to reconstitute, so plan accordingly.
Beans
Canned beans are healthy and hearty and suitable to eat alone, or mix with other ingredients. If you purchase precooked beans in pouches, they’ll be easier to pack should you need to leave home, and while they may be best warmed up, they don’t require any additional cooking.
Precooked Rice
Similarly, precooked rice can come in handy if you find yourself without a way to boil water. You don’t have to heat it at all in order to eat it.
Nuts
Nuts provide protein and healthy fats on the move or otherwise. Trail mix is another option, though you’d be best served staying away from ones with high levels of sugar and preservatives.
Protein Bars
Lightweight, easy to pack, and quite healthy if you buy the right kind, protein bars are a no-brainer for your bug out bag.
Chocolate
Chocolate has historically been a part of military rations, but the kind designed to give soldiers a quick energy boost is not quite the same variety you’ll find in the candy bar aisle. Still, chocolate can also be good for morale, and you should plan to give yourself whatever comfort you can, so stash a few fancy bars in your emergency rations.
Pet Food
Not for you to eat (although if you’re entirely out of other options, you certainly could), but if you have pets, you’ll want to make sure they’re well supplied too. It’s a good idea to have extra portions of their accustomed food on hand just in case; even if you can find them food in a pinch, if you switch their normal formula abruptly, it could cause gastrointestinal upset, which is the last thing either of you needs in an already stressful situation.
Perishables
If you’re sheltering in place and it looks like you might lose power, or if you have enough time to safely prep food before evacuating, cook your perishables in advance—hard boil your eggs, grill or sauté your meats, steam or roast your fresh vegetables, and eat those foods first. Then turn to your shelf-stable options, and hang in there as best you can.
from Food News – Chowhound https://ift.tt/2HwVNk0
via IFTTT